Tuesday, January 31, 2012

Crispy Broccoli Rabe and Chickpeas Recipe- a keeper!

How is everyone's week going?  Work has been very busy, but I finally found some time for a quick post.  Over the weekend I tried a new recipe, and it's a keeper! I was pleasantly surprised by how fast it was to make and how delicious it tasted! This was the best broccoli rabe I've ever cooked!


Ingredients:
1 bunch broccoli rabe, rinsed and trimmed
1 15 oz can chickpeas, drained
2 cloves garlic, sliced
3 tbsp extra-virgin olive oil, plus more for drizzling
crushed red pepper flakes
2 tbsp lemon juice
salt
pasta (optional)

Method:
1. Heat broiler.  On two baking sheets toss broccoli rabe, chickpeas, and garlic with oil; season with salt.   
2. Broil 2 minutes, then flip broccoli rabe and continue to broil until leaves are crisp and stems tender, about 2 minutes more.
3.  Served topped with red pepper flakes.  Add lemon juice and drizzle of olive oil.
**Can be served as a warm salad or over pasta for a heartier dish.
(Serves 4)

Until next time,

Saturday, January 21, 2012

Bringing nature indoors

Let it snow, let it snow, let it snow! (I'm afraid to announce that for all the snow haters.) We had our first snow fall of the year! I love a fresh snow fall when it coats the trees and it is still pretty and white.  

When I woke up this morning and saw the snow covered branches outside my window I knew I had to share my Frosted Branches project! 

Photo Credit: David Santiago Caicedo
I found inspiration for this idea on several blogs...particularly on: Brassy Apple. 

For this project you will need:
Epsom Salt
Spray Adhesive
Branches
A Vase
Cardboard

1. Use cardboard to protect your workspace.
2. One at a time, coat each branch with spray adhesive.
3. Sprinkle Epsom Salt over the branches, creating a glistening snow look.
4. Pour Epsom Salt in a tall vase and arrange your branches to your liking.

You can dress the arrangement up with candles, ribbon, ornaments, etc.
There you have it! Adding a touch of nature and winter to your home can be easy! This is a great piece for a mantel or an entry way table.

Photo Credit: David Santiago Caicedo
Thanks for reading! I'd love to hear your thoughts or ideas on other ways to bring nature indoors. (And a big thank you to David for taking pictures of my project!)

Check out David's beautiful bone china décor here: Rocks&Mountains

Take care,


Tuesday, January 17, 2012

My first DIY wreath!!

I'm very excited to share with you my first DIY wreath! After some trial and error, this is the end result!


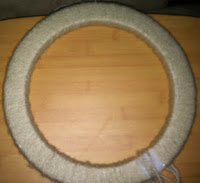
                                                                     Here is how the wreath came to be.... I started with a styrofoam wreath, but I recommend using a straw wreath and keep the plastic cover wrapped on the wreath.  The straw wreaths have a rounder and fuller final look.
                                                                 First I wrapped the wreath with a soft yarn.

My first attempt came out thin looking. 


For my second attempt, I wrapped batting with tape around the styrofoam wreath.  This helped the wreath look fuller. (This is why I recommend using a straw wreath instead.)
  

I secured these faux berry branches onto the wreath by tying them on with yarn.


Next I tied on strands of gray satin material just for looks. 
The gray satin fabric pieces are scraps from my maid of honor dress! 
Lastly I added felt rosettes with buttons and beads in the center.  The berry colored buttons and beads help tie all the colors together.  This was my first time making these, and I found Home Stories A 2 Z's tutorial to be extremely helpful!

The flowers add balance to the wreath for it to hang straight.
And there you have it! My first DIY wreath! 


Until next time, 

Monday, January 16, 2012

Winter Styling

Hi there! Thanks for checking out this post!  It's a chilly chilly day, so I thought I'd share some of the home styling I did over this past week.  Since I hate the empty feeling after all the Christmas decorations are put away, I'm finding ways for my apartment to keep the full feeling with winter decor. 

I dressed up my living room mirror by hanging these glittery snowflake ornaments.  I used tree ornament hooks and colored them with a black permanent marker to match the frame. 

This vase still has a holiday flare, but I think the snowmen make it work for the winter season. 

One theme throughout my posts is giving a new look to items that I already have in my apartment.  During the holidays I dressed this green candle with a red ribbon.  Now I wrapped it with yarn to transition it into winter decor.  

Using coasters as candle bases are a great way to add height to your candle display and protect your table from wax.  

(In the fall, the white candle started as this (click and scroll down the page) to this holiday look
 to the look above! (Small and easy changes.) 
I'm done with the old (for now) and on to the new! For my next post I'm going to share the winter wreath that I made! I'd love for you to continue following my blog by Joining or Subscribing (see the right side of the page!)

Thanks for stopping by! 

Saturday, January 14, 2012

White Bean and Mushroom Stew

Brr, it feels like 23 degrees outside!  Today I spent the day indoors doing some cooking and baking as well as winter decorating and reorganizing.  I'm going to share this delicious stew recipe that I tried today.  It's from Real Simple magazine and has left my apartment smelling so good! 

White Bean and Mushroom Stew
Serves 4 to 6
Ingredients:
2 tbsp extra-virgin olive oil, plus more for drizzling
1 onion, chopped
1 stalk celery, diced 
1 carrot, pealed and diced
1lb cremini mushrooms, quartered
1/2 cup white wine
1 28-oz can whole tomatoes, pureed in a blender

1 sprig fresh rosemary
2 cups cooked white beans (or 1 16oz can), drained
coarse salt and freshly ground pepper

Method:
1. Heat oil in a medium saucepan over medium heat.  Cook onion, celery, and carrots until tender, about 8 minutes.  Increase heat to medium-high, add mushrooms, and cook until softened, 5 to 7 minutes. 
2. Deglaze with wine, scraping up any brown bits with a wooden spoon.
3. Add tomatoes, rosemary, beans, and 1/2 cup water.  Bring to a boil; reduce heat and simmer until slightly thickened, about 15 minutes.  Season with salt and pepper.  Serve with a drizzle of oil. 

Mmm, doesn't it look good?!
I was surprised by how fast this was to make!  How do you like to spend your winter days? 
Stayed tune this week; I'm going to share some of my winter decor projects/ideas.  


Wednesday, January 11, 2012

Vision Boarding

Hi everyone! I have had a busy start to the new year.  I'm happy to finally have a chance to write a new post! Last weekend my friend Andrea, (check out her blog! FOCUS), hosted a fabulous Vision Board gathering.  I had such a wonderful time! It was great to take time to think about my aspirations and get to know the other women.  The process reminded me of art therapy.  I found it energizing and inspiring.  I enjoyed seeing how each person's board reflected their unique personality.

my vision board
I have my board hanging in my room so that I am reminded at the start and end of each day of what I want manifested in my life.   As you can see I have a lot of images/words about DIY, art, and design.  Hopefully the board will help attract creative ideas into my life!

I'd love to hear your thoughts on vision boarding, and if you've had any experiences!

Thanks for reading,