Tuesday, September 25, 2012

Brookies

If you like chocolate...and if you like cookies and brownies then you will love this simple and delicious recipe by the Clinton St. Baking Company!  "A Brookie is a cross between a brownie and a cookie."

Ingredients
1 tbsp canola oil
1 tsp unsalted butter
2 cups semisweet chocolate chunks
2 large eggs
1/4 cup light brown sugar
1/2 tsp vanilla extract
1/2 cup all-purpose flour
1/4 tsp baking power 
1/4 tsp salt

Method:
1. Preheat oven to 350F.
2. Melt the oil, butter, and 1 cup of the chocolate together in the microwave or on the stove using a double boiler. Let cool.
3.  In another bowl, whisk the eggs, brown sugar, and vanilla together.
4. Fold the melted chocolate mixture into the egg mixture.
5.  In another bowl, whisk together the remaining dry ingredients (flour & baking powder).  Add the flour mixture into the chocolate mixture, mix until combined, and then add in the remaining chocolate chunks.
6.  Freeze the batter in a shallow pan for 6 to 8 minutes (until the batter sets and hardens slightly.) 
7.  Coat 2 cookie sheets with nonstick coking spray or line with parchment paper.  Scoop about 10 tbsp-size Brookies onto each sheet.  Bake for 11-12 minutes, until the tops look dry and cracked (insides will still be moist.)  Cool completely.
Makes 10 to 20 Brookies

Enjoy!

Monday, September 10, 2012

DIY Autumn Wreath

Hello!! To help myself get over the end of the summer I put together a project to make an autumn wreath.  My inspiration came from this wreath from pinterest.  I'm proud of this wreath because figuring out how to weave the ribbon through the metal frame was difficult! Let the Fall decorating begin!! 

Materials used: 
1 16 in. metal wreath form
2 rolls of wired burlap ribbon (2 1/2 in. x 5 yrds)
decorative ribbon (for bow)
faux flowers embellishments 
scissors 
needle and thread
Method: 

1. Starting with the outer two wires weave the ribbon back and forth to make 6 loops.  Keep the ribbon loose to create a puffy loop.  You may need to adjust as you go by scrunching the loops together to make room for all 6.  At the 7th loop, straddle the ribbon from one side of the vertical wire divider to the next.  Then continue to make 6 more loops. 
2.  After you make your way around the outer circle, cut off any excess ribbon and tuck in the end.  Begin to make your loops on the inner circle just like the outer.  This time create 4 loops per section and straddle the 5th.


3. Decorate your wreath to your taste.  First I create a bow at the bottom.

(I tied a piece of ribbon vertically, and knotted it on the back.  Then I slid a longer piece of ribbon under the loop and tied a bow.  I'm not the best bow maker...took several tries!)

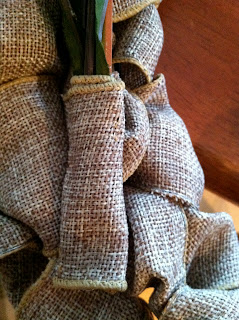
After arranging the faux flowers, I wrapped them together in left over ribbon.  I secured the wrap by hand sewing the end.  Then I attached the flowers onto the wreath by sewing the wrap onto the loops.
More fall decorating DIY to come!!
Thanks for coming by!