Wednesday, February 29, 2012

Wine Bottle Candle Holders

I'm back with a fun wine bottle candle holder project!  (I was inspired by this on Pintrest and used this tutorial.) I love creating a warm and friendly ambiance, and these wine bottle candle holders give off a pretty glow.  Soon I'll need to replace my winter candle holders with Spring decor, and I think the wine glasses will be a great touch!

Did you know that you can cut a glass bottle without using any tools? Well you can! Keep reading to see how!

Here's what you need:
Empty wine bottles, cotton string, nail polish remover, and matches


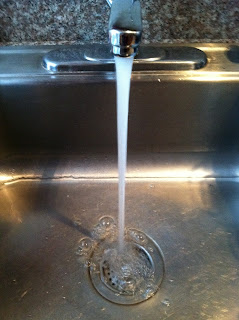
1.  Remove labels.  Soak bottle(s) for 20 minutes a sink of warm to hot water with 3 drops of soap. Labels should peel off.  You may need to scrap off leftover glue.

2.  Drain the warm water and refill sink with cold water. 

 3.  Wrap cotton string around the bottle about 5 to 6 times.  Tie a knot and cut off ends.

4.  Roll the string hoop off the bottle and soak it in the nail polish remover. Make sure the entire hoop is saturated in the polish remover. 

5.  Place the hoop back on the bottle in the location where you want the cut to be made.  (It's easier if you put the hoop back on over the neck of the bottle, and then slide it down.)

6. Standing over the sink, light the string on fire.  Hold the neck of the bottle and slowly rotate it so the flame burns the string evenly.  Tilt the bottle so the base is pointed slightly upwards to retain the heat.

7.  After the flame burns out, gently plunge the bottle in the cold water.  The bottle will cut in half.  It most likely won't be even and you may prefer to sand the edges.

Here is the end result!

I'm fascinated by how you can cut a bottle using this method! I'll post pictures when I complete more.  I plan to do different sizes, colors, and widths.  I'm going to add sand or some type of filler to the base as well.  

I also want to cut out the bottom of a bottle and fill it with stringed lights. Like this!
  Source: austinweddingblog.com via Amanda on Pinterest
       
Stay tuned!


P.S. Check out this beautiful bone china décor by Rocks&Mountains


Monday, February 20, 2012

New Recipe: Baked barley risotto with butternut squash

Hello! Today is the one month marker until Spring! This means there is one month left to try the cozy warm recipes that I have on my list.   If you have some time and want to try a new recipe...well then I have a new dish to share with you!  It's not the fastest to cook, but the end result is well worth it.  It calls for only one pan, so at least the clean up is easy!
Here's what you'll need:
Ingredients: 
2 tablespoons olive oil
1 small butternut squash (about 1 1/2 pounds)- peeled, seeded and cut into 1-inch pieces (This was the most time consuming part because peeling the squash was tough!  Some stores sell pre-cubed pieces.)
1 onion, finely chopped
salt and pepper
1 cup pearl barley 
1/2 cup dry white wine (This really made the dish!)
3 cups low-sodium vegetable broth
5 ounces baby spinach
1/2 cup grated Parmesan cheese
1 tablespoon unsalted butter

Method:
1.  Heat oven to 400 F.  Heat oil in a Dutch oven or a large oven-safe saucepan over medium-high heat.  Add the squash, onion, 3/4 teaspoon salt, and 1/4 teaspoon pepper.  Stir often until the onion begins to soften, about 4 to 6 minutes. 
2. Add the barley to the vegetables and cook, stirring, for 1 minute.  Add the wine, stirring until evaporated, about 1 minute.  Add the broth and bring to a boil; cover the pot and transfer it to oven.  Bake until the barley is tender, 35 to 40 minutes.
3.  Stir in the spinach, Parmesan cheese, and butter.


On the project side, I'm collecting material to do a fun project I found on Pintrest.  I'll going to attempt DIY coasters.
Stay tuned!


Tuesday, February 14, 2012

Happy Valentine's Day!

I hope everyone has a lovely Valentine's Day! This is the front of the homemade Valentine's Day card I made based on my last post.  If you haven't read it, you can check it out here!

xoxo,

Sunday, February 12, 2012

Homemade Valentine's Day Cards

I'm working towards becoming a licensed Mental Health Counselor and creative expression has been and will continue to be a way for me to care for my own mental health.  (This blog is one of my outlets!) I'm a big supporter of art therapy!

Today I'm going to share how my friend Cara uses card making as one of her creative outlets.  This not only makes her happy, but it also spreads happiness to others!  I feel appreciative of the times that I've received her homemade card in the mail!

Cara and I met at band camp (you may laugh, but we took marching band seriously! haha) We were cabin-mates and we bonded over reading the Chicken Soup for the Soul books.  Our friendship grew as we shared similar interests in being creative,  finding adventures, and much more. Without further ado, I'll turn this over to her!


A couple of years ago I started making cards...for holidays, birthdays, or just because! It's a great way to de-stress and let out my somewhat creative side.  I never really know what the finished products will be, so it's always a fun process.  The past couple of years I've made valentines for friends and family. (maybe just because I like cutting out hearts?!) They're easy to do and a cute way to show someone you're thinking of them...

What You'll Need: Gather various art materials. Here's a great chance to recycle! I always use paper I have around, old newspapers and magazines, stamps, markers....also, have a glue stick and scissors handy.  For today's project I even used a silver candy wrapper for some glimmer on one of the cards.

Method:
1. Create the card itself by folding a colorful piece of paper in half.  I tend to cut them into different sizes. You can also buy blank cards from the store and use those as a base.
2. Add more depth and dimension by gluing a smaller piece of paper of a different color to your card base.


3. Cut away! Go through the magazines, newspapers, and paper to cut and collect letters, pictures, hearts. I always create a stockpile at the beginning of my project and then mix and match throughout....
4. Glue down your selection of words, shapes, and pictures to create the front of your card.  You can always add some extra touches with your own writing or a bit of glitter. 
5. Don't forget to add a personal message on the inside and there ya go, lotsa love ready to send! 
(Notice the shiny candy wrapper heart on the card furthest to the right.) I love that idea! -Amanda
Thanks Cara for sharing with us! What great way to show love....by taking the time to personally design a card for someone.  This has inspired me to make my own homemade Valentine this year! 

Monday, February 6, 2012

Weekend Recap

I had quite the party weekend!  Saturday was my boyfriend's birthday and we celebrated with a lunch party for the family and an evening party as well! We cooked a lot and I tried a new appetizer that I found on Pintrest. (You can find the original blog post here.)  I love this appetizer because it's healthy, colorful, and delicious!


Ingredients:
Basil
Mozzarella Cheese 
Grape Tomatoes
Olive Oil
Balsamic Vinaigrette 

*Wait until right before serving to drizzle the olive oil and balsamic vinaigrette

As I was decorating for the party, I made use of the closed up fireplace brick portion of the wall in my living room.  


Using a ruler, I cut out letters from magazine pages, and hung them on string with clothes pins.


This wall has been my design challenge.  In my ideal world it would be a usable fireplace with a mantle, but what can I do! The brick looks pretty, but I am searching for decor ideas on how to embellish it.  Perhaps I'll hang pictures from the clothes pins.  Any ideas are welcome!!


Thanks for reading!